Builder Grade vs. Custom: What's Actually Worth Upgrading (And What's a Waste of Money)
Your builder hands you an upgrade sheet. Cabinets: $8,000 upgrade. Flooring: $5,000 upgrade. Lighting package: $3,000 upgrade. Appliances: $6,000 upgrade. Before you know it, you're staring at $40,000 in "optional" upgrades wondering which ones are worth it and which ones are just padding the builder's margin.
Here's what 15+ years of building custom homes has taught me: about half of the upgrades your builder offers are genuinely worth the money. The other half are things you can do yourself for less — or skip entirely.
The trick is knowing which is which. Because the upgrades that matter are the ones you can't easily change later. And the ones you should skip are the ones you can swap out with a screwdriver and an afternoon.
The smartest money in construction is spent on what you'll never see — and saved on what you can easily change later.
Upgrade
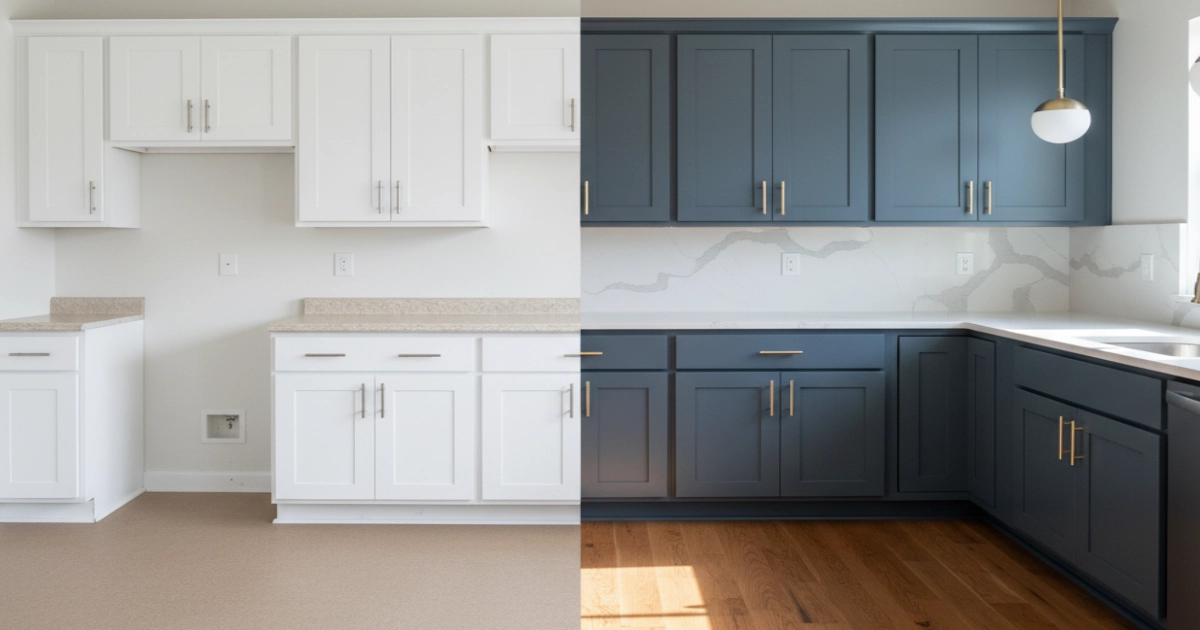
Kitchen Cabinets
Builder grade: $8K-15K | Mid-range: $15K-30K | Custom: $30K-60K
Cabinets are the #1 thing that makes a kitchen feel cheap or expensive. Builder grade means particle board boxes, thin MDF doors, basic hinges that start sagging in 3 years, and drawers that stick. You open them every single day. You feel the quality — or lack of it — every single time.
And here's the real problem: cabinets are built into the walls. Replacing them means pulling countertops, disconnecting plumbing, removing backsplash, and starting from scratch. A cabinet replacement is a $20,000-$40,000 kitchen renovation.
Builder grade
Particle board boxes (swell when wet).
Stapled construction, not screwed.
Basic hinges — no soft-close.
Shallow drawers, minimal storage.
Mid-range upgrade
Plywood boxes (water-resistant, stronger).
Dovetail drawer joints, full extension slides.
Soft-close doors and drawers standard.
Deeper drawers, pull-out shelves, lazy susans.
Here's the secret: upgrade the BOXES, not the doors. Plywood boxes with mid-range doors will outlast particle board boxes with fancy fronts every time. The box is the structure — the door is cosmetic. You can always replace a door for $50-100 later. You can't replace a box without gutting the kitchen. Ask your builder for plywood box construction with standard door fronts. That's where the real value is.
Upgrade
Windows
Upgrade cost: $3K-8K more for entire house | Energy savings: $800-1,500/year
Windows are the single highest-ROI upgrade in a new build. They affect energy bills, indoor comfort, street noise, UV damage to floors and furniture, and resale value. And they're extremely hard to replace later — the exterior siding, trim, flashing, and interior casing all have to be modified.
| Feature | Builder grade | Upgraded |
|---|---|---|
| Glass | Basic double-pane, clear | Low-E double/triple pane, argon filled |
| Frame | Basic vinyl | Fiberglass or composite |
| U-Factor | 0.30-0.35 | 0.20-0.25 |
| Energy cost/year (avg home) | $2,400-3,200 | $1,200-1,800 |
| Lifespan | 15-20 years | 25-35 years |
| Replacement cost later | $800-1,500 per window (entire house: $15K-30K) | |
- Low-E coating — reduces UV by 70-80% and keeps heat transfer down
- Argon gas fill — better insulation than air, costs $20-40 more per window
- Triple-pane in northern climates or if you're near a busy road (noise reduction)
- Fiberglass frames in extreme climates (won't expand/contract like vinyl)
Upgrade
Insulation
Upgrade cost: $2K-6K more | Energy savings: 30-50% on heating/cooling
Insulation is hidden behind your walls forever. The cheapest time to upgrade is right now — during construction, before drywall goes up. After that, upgrading insulation means tearing out walls. Nobody does that.
Builder grade is R-13 fiberglass batts in exterior walls. It's the bare minimum. Poorly installed batts (compressed, gaps, missing sections) are extremely common — and you'll never see it behind the drywall.
- Spray foam in exterior walls: eliminates drafts, reduces HVAC costs 30-50%
- At minimum: blown-in cellulose in attic (R-38 to R-60) instead of batts
- Rim joists: spray foam here prevents the #1 source of cold air infiltration in two-story homes
- Garage walls (if garage shares a wall with living space): insulate to exterior wall spec
Depends
Flooring
Builder grade: $3-5/sqft | Mid-range: $6-10/sqft | Premium: $10-18/sqft
Flooring is under your feet every day. Cheap flooring shows wear in 2-3 years — scratches, dents, peeling edges. But not all flooring upgrades are equal. Some are worth it during construction. Others you can easily swap later.
| Type | Builder grade | Upgrade worth it? |
|---|---|---|
| Hardwood | Thin, select grade | Yes — thicker planks last 50+ years, can be refinished 3-5 times |
| Tile | 12x12 basic ceramic | Yes — porcelain lasts forever, larger format looks premium |
| LVP (luxury vinyl) | Entry-level LVP | No — builder grade LVP is decent, premium LVP isn't much better |
| Carpet | Builder grade nylon | No — all carpet wears out in 5-8 years, replace when worn |
If budget is tight, here's what I tell clients: upgrade tile in the bathrooms (you're stuck with it — it's set in mortar) and upgrade hardwood in the main living areas (it's hard to replace without moving out). Skip the carpet and LVP upgrades — you can replace those in 5 years without touching walls or plumbing.
Depends
Countertops
Laminate: $1K-3K | Granite: $3K-6K | Quartz: $4K-8K
Unlike cabinets, countertops are relatively easy to replace. They sit on top of the cabinets — remove the sink, disconnect plumbing, lift off the old top, set the new one. It's a 1-2 day job, not a full renovation.
So if budget is tight, get the laminate now and replace with quartz in 3-5 years. You won't need to touch the cabinets, backsplash (if you plan for it), or plumbing layout.
But — if you CAN afford granite or quartz during the build, do it. It's cheaper during construction than as a retrofit: no disconnection/reconnection of plumbing, no new sink cutout, no matching the backsplash. You save $800-1,500 by doing it during the build vs. later.
- Budget tight? Laminate now, upgrade later. Easy swap.
- Can afford it? Quartz during construction saves $800-1,500 vs. retrofit
- Avoid: marble in kitchens (etches, stains, high maintenance) and tile countertops (grout collects grime)
- If going laminate now, choose a white or neutral — it'll match any future stone upgrade
Depends
Plumbing Fixtures
Faucet swap: $100-300 DIY | Shower valve replacement: $2,000-5,000
This is the one where the answer is split right down the middle. Some plumbing fixtures are a 15-minute swap. Others are buried behind tile and concrete.
Upgrade during build
Shower valve — behind the tile wall. Cheap valves fail in 5-7 years = tear out the entire shower to replace.
Main shutoffs — quality ball valves vs. builder grade gate valves that seize up in 3 years.
Hose bibs — frost-proof in cold climates. Can't replace without opening the wall.
Skip the builder upgrade
Faucets — 15-minute swap. Buy the one you actually want from Amazon for half the price.
Showerheads — screw on, screw off. $30-150 to upgrade yourself.
Toilets — builder charges $400 to upgrade. Buy a Toto yourself for $300 and have the plumber install it.
The shower valve is the single most important plumbing decision in the house. A $40 builder-grade valve vs. a $200 Moen or Delta pressure-balancing valve — the difference is invisible behind the wall, but the cheap one will fail and you'll be tearing out tile to replace it. Spend the $200. It's behind cement board and tile. You will never easily access it again.
Knowing What to Upgrade — and When
The Home Building Checklist Bundle helps you make smart decisions at every phase — from materials to inspections to final walkthrough.
See the Checklist Bundle
Skip
Appliances
Builder markup: 30-40% | Savings buying yourself: $2,000-5,000
Your builder is buying appliances from the same suppliers you can access. The difference? Their 30-40% markup. That $3,000 refrigerator on the upgrade sheet? You can buy the exact same one at a retailer for $2,000-2,200.
The smart move: ask your builder for an "appliance allowance" credit. They deduct the builder-grade appliance cost from your contract, and you buy your own. You get exactly what you want at retail pricing.
- Take the appliance credit and shop yourself — especially for fridge, dishwasher, and washer/dryer
- Buy during holiday sales (Memorial Day, Black Friday, Labor Day) for an extra 15-25% off
- Schedule delivery for after drywall but before countertop installation (appliances need to be on-site for countertop templating)
Built-in refrigerators, panel-ready dishwashers, and range hoods need to be sized during cabinet design. If you're going built-in, select these BEFORE cabinet installation — the cabinet framing is built around them. These are the only appliances where the builder's involvement during construction matters.
I tell every client — take the appliance credit. Your builder is ordering from the same distributor you can buy from at Home Depot, Lowe's, or AJ Madison. The only thing you're paying for with the builder's "upgrade package" is their convenience fee. Save $2,000-5,000 and buy exactly what you want.
Skip
Lighting Fixtures
Builder markup: $150-300 per fixture | DIY swap: 15 minutes each
Lighting fixtures are the easiest thing in your house to change. Turn off the breaker, unscrew three wire nuts, hang the new fixture, turn the breaker back on. Fifteen minutes. No drywall damage, no painting, no contractor needed.
Your builder will charge $300 for a chandelier you can buy for $150 online. And you probably don't even know what style you want until you're living in the space and see how the light falls.
The fixture is easy to swap. The junction box location is NOT — that's electrical rough-in. More recessed cans in the right places makes a bigger difference than an expensive pendant light in the wrong place. Ask for 6" recessed cans every 4-5 feet in the kitchen, living room, and hallways. That's an electrical decision, not a fixture decision.
- Accept builder-grade fixtures during construction (they're included in the base price anyway)
- Upgrade recessed light LOCATIONS during electrical rough-in — add more cans while walls are open
- Buy your fixtures after move-in when you see the space in person — Amazon, Wayfair, and local lighting stores have better selection and lower prices than your builder's catalog
- Budget $1,000-2,000 for post-move-in fixture upgrades — you'll do it room by room as you settle in
Skip
Interior Doors
Hollow-core: $30-50/door | Solid-core: $80-150/door | Swap: 30 min each
Builder grade interior doors are hollow-core — light, flimsy, and they sound like cardboard when you knock on them. Solid-core doors are heavier, quieter, and feel like a real door. But here's the thing: swapping an interior door is a 30-minute job. Same hinges, same frame, same hardware. You just swap the slab.
A typical home has 15-20 interior doors. Upgrading them all from hollow to solid through your builder costs $2,000-3,000 with their markup. Doing it yourself with doors from Home Depot: $750-1,500.
- Accept hollow-core for now — they work fine as doors
- Upgrade to solid-core yourself later for $50-100 per door. Same size, same hinge locations, drop-in replacement
- Priority upgrades: bedroom doors (noise) and bathroom doors (privacy/weight)
Pocket doors slide inside the wall — they need a framing modification (doubled studs, special track). Barn doors need a header and blocking for the track mount. Both of these must be decided during framing. If there's any chance you'll want a pocket door or barn door somewhere, tell your builder NOW. The door itself can be upgraded later, but the wall framing can't.
Upgrade
Exterior Doors and Entry
Builder grade steel: $200-400 | Quality fiberglass: $800-1,500 | Wood: $1,500-4,000
Your front door is the first thing every visitor sees. A cheap steel entry door with a plastic handle says "builder grade" louder than anything else on the house. A quality fiberglass door with real hardware says "this homeowner cared about the details."
Beyond aesthetics, exterior doors affect weatherproofing, energy efficiency, and security. Builder-grade steel doors dent, rust at the bottom, and have minimal insulation. Quality fiberglass doors don't dent, don't rust, insulate better, and last 30+ years.
Replacing an exterior door later is harder than it sounds — the threshold, weatherstripping, and framing tolerances all need to match. It's a $1,500-3,000 job per door for a professional installation. During construction, the upgrade cost is $400-800 per door.
- Front entry door — fiberglass with quality hardware ($800-1,500 vs. $200 builder grade)
- Sliding patio door — upgrade to a quality vinyl or fiberglass slider with Low-E glass
- Garage entry door — if it enters a conditioned space, get an insulated fiberglass door, not a hollow steel one
- Deadbolts — quality Schlage or Kwikset smart locks ($150-250) vs. builder grade keyed lock ($15)
Skip
Paint
Builder upgrade: $1K-2K | Repaint yourself: $300-600 in materials
Builder grade paint is one coat of flat paint over primer. It scuffs if you look at it wrong. The "paint upgrade" from your builder gets you a slightly better paint and maybe a satin finish. For $1,000-2,000.
The real play: skip the upgrade entirely. Move in. Live in the house for a few weeks. See how the light hits each room. Then paint the house yourself with the exact colors and finishes you want. A gallon of Benjamin Moore or Sherwin-Williams costs $50-70. A full-house repaint in materials is $300-600. It's the most impactful DIY upgrade and the easiest to do.
- Skip the builder's paint upgrade — it's overpriced for what you get
- Live in the house first and see how light hits each room before choosing colors
- Use eggshell or satin finish in high-traffic areas (kitchens, hallways, kids' rooms) — flat paint scuffs
- Budget $300-600 for paint materials + one weekend per room
Skip
Hardware (Knobs, Pulls, Hinges)
Builder upgrade: $800-1,500 | DIY upgrade: $200-500 total
Builder grade hardware: satin nickel knobs from a contractor 100-pack at $2 each. They look cheap because they are cheap. But here's the good news — swapping hardware takes 5 minutes per knob with a screwdriver. No contractor needed, no damage, no expertise required.
A typical kitchen has 25-35 knobs/pulls. A typical house has 40-60 total. At $5-15 per knob/pull from Amazon, you're looking at $200-500 to upgrade the entire house. Your builder would charge $800-1,500 for the same upgrade.
- Accept builder grade hardware — it's functional even if it's ugly
- Order new knobs and pulls after move-in ($5-15 each from Amazon, Wayfair, or Rejuvenation)
- Match the finish to your faucets and lighting (matte black, brushed gold, etc.)
- Total time: one afternoon with a screwdriver. Total savings: $400-1,000 vs. builder upgrade.
Build Smarter, Not Just Bigger
15 years of field experience in one download. The Home Building Checklist Bundle covers every phase of construction with checklists, a budget tracker, and a materials list.
Get the Complete BundleThe Upgrade Cheat Sheet
| Category | Verdict | Easy to change later? |
|---|---|---|
| Kitchen cabinets | UPGRADE | No — built into walls |
| Windows | UPGRADE | No — framed into structure |
| Insulation | UPGRADE | No — hidden behind drywall |
| Flooring | DEPENDS | Partially — tile/hardwood hard, carpet/LVP easy |
| Countertops | DEPENDS | Yes — sits on top of cabinets |
| Plumbing fixtures | DEPENDS | Faucets yes, valves no |
| Appliances | SKIP | Yes — plug in, plug out |
| Lighting fixtures | SKIP | Yes — 15-minute swap |
| Interior doors | SKIP | Yes — 30-minute swap |
| Exterior doors | UPGRADE | No — threshold + weatherproofing |
| Paint | SKIP | Yes — easiest DIY project |
| Hardware | SKIP | Yes — 5-minute swap per knob |
The Smart Upgrade Strategy
Here's the framework I give every client. Three rules, zero exceptions:
1. Upgrade what's BEHIND the walls
Insulation, wiring, plumbing valves, soundproofing. You'll never see it again after drywall. This is where the real value is — and where cutting corners hurts the most.
2. Upgrade what's HARD to replace
Windows, cabinets, exterior doors, tile flooring. These are expensive and disruptive to change later. Get them right the first time if budget allows.
3. Skip what's EASY to swap
Fixtures, hardware, paint, appliances, interior doors. All of these can be upgraded in an afternoon for less than the builder charges. Save the money.
Following these three rules saves the average homeowner $15,000-$25,000 in unnecessary builder upgrades — money that can go toward the upgrades that actually matter. That's $15,000 more for better insulation, better windows, and better cabinets instead of overpriced light fixtures and appliances with a builder markup.
Final Thoughts
Builder upgrades aren't inherently bad. Some of them are genuinely worth every dollar. But the upgrade sheet is designed to maximize the builder's revenue, not your home's value. Your job is to tell the difference.
The rule is simple: spend on what's permanent, save on what's swappable. Insulation, windows, cabinets, and shower valves are permanent. Light fixtures, faucets, paint, and door knobs are not.
Put your money where it can't be changed later. Save it everywhere else. You'll end up with a better house for less money — and $15,000-25,000 in savings you can use for the things that actually make your home yours.
For more on where the surprise costs hide, read my guide on the hidden costs of building a custom home. And for the construction decisions that lock in before you can upgrade anything, check out 12 decisions you can't undo after framing.
To know exactly what to check at every stage of your build, see my phase-by-phase inspection guide.